Packing Tips for Moving Overseas
Whether you are moving across the country or across the sea, packing can be overwhelming. How did you acquire so much stuff? If you’re lucky, your company will pay for most of the relocation costs. If you are doing this on your own, it’s time to “clean house”, decide what’s really important, and become a master at the art of packing. Here are our tried-and-true packing tips for moving overseas.
Disclosure: Some of the links below are affiliate links which means we will receive a small commission when you make a purchase at no additional cost to you.

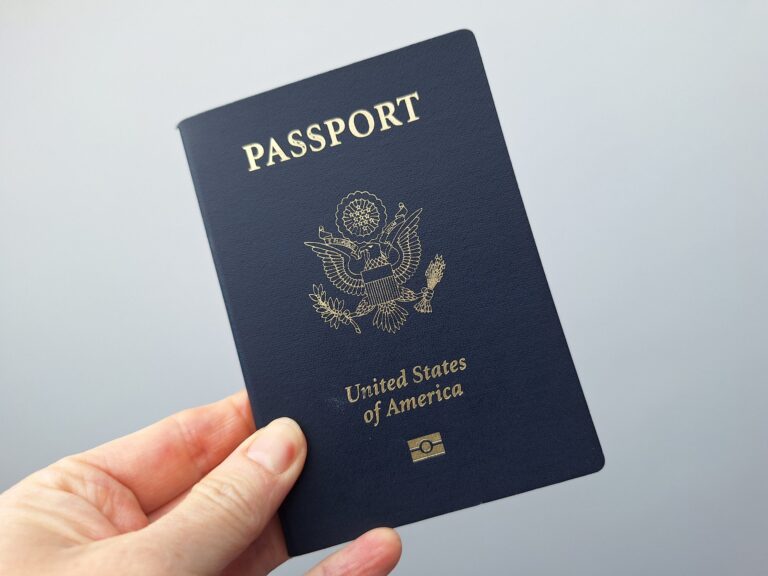
Contact the Consulate For Information
If shipping overseas, find out from the country’s Consulate what you can and cannot ship into the country and any other legal requirements. This will save you a lot of time and money at customs, and let you know what you cannot bring with you. For example, you may only be able to bring a certain amount of electronics, and some countries will charge extra fees if your item is in the original packing, no matter how old it is.
Customs wanted to charge us an import fee on a 35-year-old espresso machine packed in its original box. It didn’t matter that the Styrofoam inserts were yellow and crumbling with age. We told them just to keep it.
Do Your Research on Shipping Companies
Research shipping companies and find out what their cost entails. Some shipping companies will charge by weight, others by cubic feet. Will they pack your items foe you, or do you need to pay a separate company for packing? Ask when your stuff will be picked up, and when it will be shipped out. A good shipping company will have a representative as your point of contact the whole time.
We discovered that it would cost $14,000 to ship down our bed, sofa, reclining loveseat and all our boxes. That really wasn’t in our budget. We decided the big things we could replace once we moved to Mexico.
Decide What to Keep and What to Get Rid Of
Now that you have your guidelines of what you can and cannot bring with you, and an estimate on the shipping cost, it’s time to walk around your house and decide what you can get rid of and what you can’t live without.
- Try on clothes and see what fits and what doesn’t. Create a “no-go” pile.
- Scan photos into your computer and put on a backup drive. The less weight the better.
- Decide what glasses and dishes have sentimental value.
- Go through your filing cabinet and see what documents you need.
- Reduce your book collection.
- Time to have a party and finish drinking all your alcohol beverages.
- Go through all your cleaning supplies in each room, consolidate, and finish using them.
- It’s time to have garage sales and get rid of anything you haven’t used in a year.

What Do You Need to Keep Unpacked Before You Move?
You need to decide what you will need for now before you move and what you will need in your new country for the first few weeks. Two main points I want you to keep in mind: You may not have access to a washer and dryer, and the kitchen may not have suitable cookware that you can use, if any. No matter where you go, you can find things to buy, but a few familiar possessions will make the transition easier.
Here is what we packed in our suitcases when we moved from Florida to Mexico:
- All of our underwear (very important)
- At least 10 days of a change of clothes (consult a weather website to decide what to pack)
- 3 pairs of shoes (sneakers, sandals, and dress shoes)
- 1 set of bed linens (highly recommended)
- 1 towel each
- Cutting board
- Kitchen knives
- Set of silverware for each of us
- 1 small frying pan
- Additional items we carried:
Jewelry
Anything of high value
Router and all of our electronics
Now that we knew what was going in our luggage, we knew what clothes, linens, and towels we had available for packing material.
Packing Material
Clothes, Towels, and Linens
A lot of the packing material you already own. You have your clothes, towels, and bed linens. Even stuff in the “no-go” pile can be used for packing material. The majority of your stuff is probably pretty sturdy and just needs a bit of cushion. Breakables such as dishware, vases and collectibles will benefit from extra soft padding material. Don’t forget, you can collect old newspapers from your neighbors, another packing freebie.
Here is a list of packing supplies you will need to buy:
You can get these at any storage location or have it shipped to you through Amazon. (With Give the Gift of Amazon Prime, you can get free shipping on shipping items!)
Shipping Supplies for moving:
- Bubble wrap (I like the smaller bubbles for cushioning. Better for different sized objects)
- Cushion foam sheets for plates, photo frames, and other breakables
- Scotch Sealing Tape (lots of it)
- Sealing Tape Dispenser (makes the job easier)
- Medium Boxes (easier to carry)
I have moved on average every four years of my life until I met Tom, so I’ve become an expert packer.
Packing the Kitchen
The hardest room to pack is the kitchen. I should know, I packed the entire kitchen by myself! I ended up with 42 boxes!
The problem with the kitchen stuff is that nothing is “uniform”. You might have a set of pots and pans that fit one on top of the other, but then you have wasted space where the handles are. Books and picture frames are easy, a food processor and casserole pans are not.
Let’s first start with separating what you need right now on an every day basis (before you move), and what you can live without for a few weeks or months (ex. food processor, crock pot, etc).
We separated items that we needed every day, but that we would not be taking with us:
- Bowls and plates
- Drinking glasses
- Some silverware
- Small pan and large pan
- One pot
- Cutting board
Things that we would need every day before and after we move:
- Silverware
- A small plate
- Cutting board
- Knives
- Small frying pan
Take everything out of the cabinets
If you try to go cabinet by cabinet, you will have wasted space in each box. I recommend taking everything out and laying it all out in a bare room. This way you can see the sizes and shapes of everything you own.

If you have original boxes and packing material, pack your items back in those.
I know this is contradicting what I said earlier, but it will help with packing, and keep your items safe. Just make the outside of the box look old and “damaged”. Write on it, get it wet, bash the corners, and maybe add a few burn marks to make it look “old”.
*Note: Try to make these boxes look weathered and not “new”. We were charged an extra re-packing fee because some of our packaging was so well preserved. Don’t give them a chance to charge you for stupid things.
Pack smaller items into larger items
Remember the Russian Doll? Look at your smaller items like ramekins or small serving bowls. Can they fit in sugar containers or pots? Use your washcloths for packing material.
***Gather smaller items like ramekins and put them inside larger items like sugar containers and pots.

Let the Packing Begin!
1) Start with padding the bottom of the box with towels or sweaters.
2) Put as many square things together as you can and layer the padding on the sides and in between.
3) Cutting boards and cookie sheets are easy because they are mostly rectangular and can be stacked. You shouldn’t need much packing material. If you do, a few layers of newspaper in between and some extra in the corners will be all you need.
4) Wrap smaller utensils or mixer attachments together and put them inside Bread molds and pie pans. Use hand towels or newspaper around the items so they don’t scratch the larger containers.
5) For larger utensils such as spatulas, tongs, and ladles, try to match them up by height. Rubber band them together and wrap them in newspaper. These will be stuffed down into the boxes by the handles of the pots and pans or in between round containers.

6) For mixers, blenders, and food processors, pack them in their original packaging boxes. If you do not have these use towels for padding, especially around the bases and corners.
7) Pack pans and pots in a box with their handles facing up. (Tip: Lay the box on its side, pack pans and pots, then turn the box right side up. You’ll have more room for the small stuff and can move the handles to a more convenient location in the box. Pad with clothing or bubble wrap sheets in between.
8) For large pots, layer the bottoms with towels (so the insides don’t get scratched) and place lightweight items in the middle. Make sure to pad with extra towels or bubble wrap along the sides.

9) Plates are easy but still need padding in between each. Bowls and teacups are more difficult. Besides the padding in-between, also wrap in bubble wrap and clothing. For heavier plates, add an extra layer of packing material between every two or three plates. This will minimize the pressure on the plates.

Your goal for each box is that when it is packed, it can be turned on its side or upside down without breaking anything inside.
Now that the kitchen is done, the rest of the house will be a piece of cake!
Helpful Tips:
- For vases or other breakables, wrap in clothing, bubble wrap, and newspaper.
- Any leftover clothes not used for packing material can be packed in vacuum bags to save space.
- Shoes can all go in a box without padding.
- Whatever loose pictures you have, try to get them scanned to a CD or a backup drive. This will cut down on the weight.
Obviously, the easiest way to move is to only take what you can carry, but sometimes that’s not possible.
I wish you luck in your big move! Packing sucks, but remember, this is the start of a new adventure!
Recommended Reading:
Should You Sell Your House Before Moving Abroad?
How to Ship Your Belongings Overseas
Should You Rent or Buy a Home in A Foreign Country?
[wp_ad_camp_1]


One Comment
Comments are closed.